From Scopes to Roles: Real-World First-Party App Patterns with Azure AD
OAuth is a standard for allowing third-party applications to access APIs on
behalf of users. For example, when LinkedIn wants to access your Google
contacts, you—the resource owner—authorize LinkedIn (the client app) via
Google’s authorization server, and LinkedIn receives a token with a specific
scope (e.g., https://www.googleapis.com/auth/contacts.readonly) to access your
data.
Source Code:
The complete source code for this blog post is available on GitHub:
fredyang/azure-ad-first-party-app
But what if you’re building an internal, first-party application for your company, using your own APIs and Azure AD as the authorization server? Let’s explore how authorization and access control differ for first-party apps, and how to implement both scope-based and role-based access control using Azure AD.
Third-Party vs. First-Party Apps
| Aspect | Third-Party App | First-Party App |
|---|---|---|
| App Ownership | External organization | Same organization as API |
| API Ownership | Different from app (external API) | Same as app (internal API) |
| Trust Relationship | Limited trust; app is untrusted by API | Full trust; app and API are trusted |
| Authorization Server | External (e.g., Google, Microsoft) | Internal (Azure AD tenant of organization) |
| User | External User | Internal User |
| User Consent | Required; user grants specific permissions | Often implicit; user trusts internal apps |
In this post, we’ll use an Angular SPA as the client, a Node.js API, and Azure AD for authentication and authorization.
App Requirements
- Users must log in to use the app.
- Staff users can view and create todo items.
- Admin users can do everything staff can, plus delete todo items.
Using 1 Azure AD client all-in-one
To start, we’ll use a single Azure AD app registration for both the SPA and the API. (Later, we’ll discuss splitting them.)
Managing Scopes
In OAuth, a scope defines the specific permissions an application can request to access an API. Because APIs do not inherently trust third-party applications, these apps must explicitly request the scopes they need, and users must grant consent for those permissions.
For a first-party app (an app owned by the same organization as the API), the API inherently trusts the app more than it would a third-party app. In this scenario, acquiring scopes is less about user consent and more about controlling which internal apps can access which APIs and what operations they can perform.
Technically, a first-party app does not always need to request explicit scopes to access the API, since trust is established by ownership and configuration in Azure AD. However, using scopes is still recommended for first-party apps because:
-
Scopes provide an extra layer of security, ensuring that even trusted apps only get the permissions they need. Scopes help with future extensibility, especially if you later introduce more apps or want to limit certain operations.
-
Scopes are required by Azure AD for issuing access tokens with permissions, even for first-party apps.
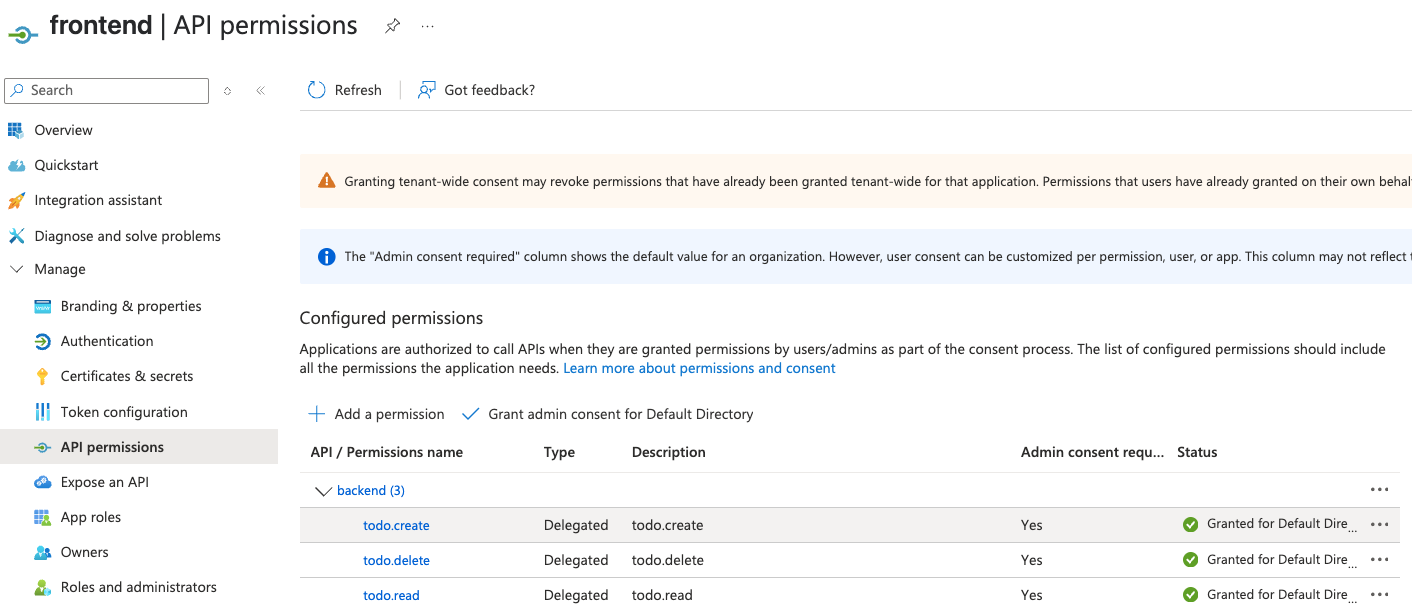
Let’s create three API scopes under the URI api://all-in-one/:
todo.readtodo.create-
todo.delete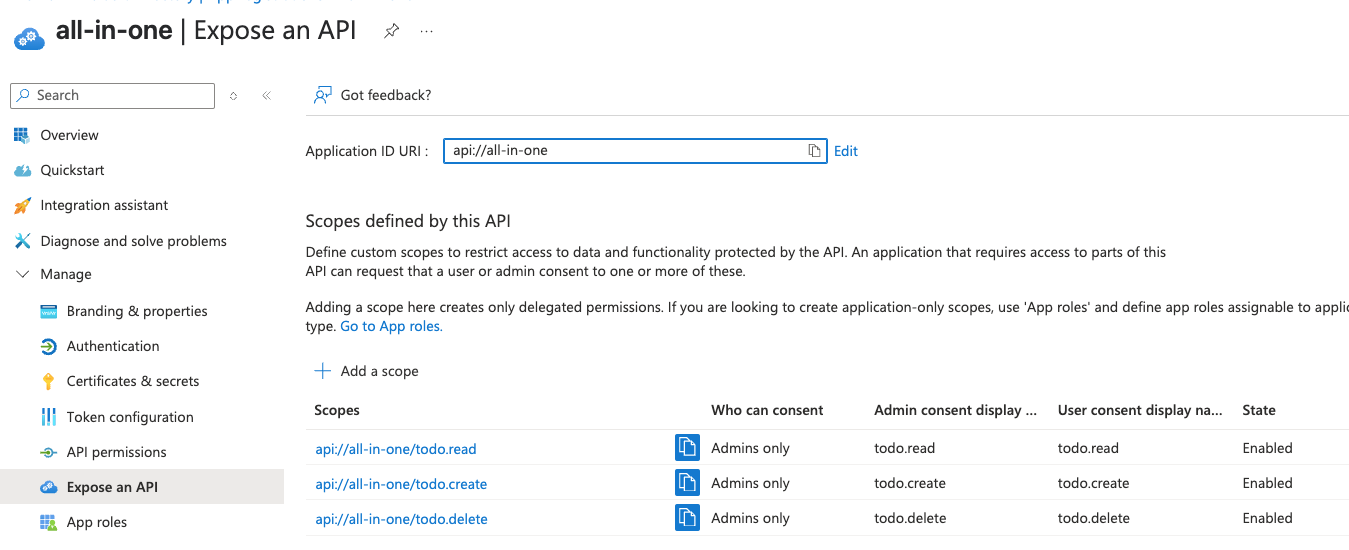
For a third-party app, scopes are usually delegated by a user to the app. As our app is a first-party app, this delegation (consent) is not necessary and even undesired. Azure AD admin needs to grant admin consent to these “Admin only” scopes. After that, they are assigned to the frontend app like the following.

Managing Roles
Roles in Azure AD extend beyond OAuth’s scope concept. While scopes control what an app can do, roles enable fine-grained, user-level access control within your organization.
For our app, we define two roles:
todo.roles.admintodo.roles.staff
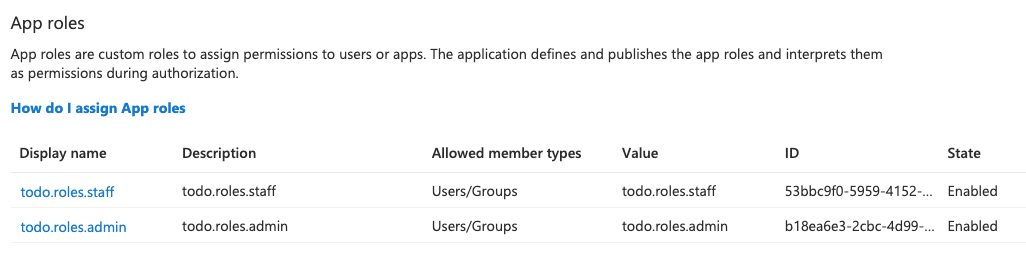

For example, user Admin might have both roles, while Staff has only the staff role.
Configuring the SPA to Call the API
We use MSAL (Microsoft Authentication Library) in the SPA to acquire access tokens with the required scopes:
export const msalInterceptorConfig: MsalInterceptorConfiguration = {
  interactionType: interceptorLoginMethod,
  protectedResourceMap: new Map([
    [
      "http://localhost:3000/api/",
      [`${environment.applicationIdUri}/.default`],
    ],
  ]),
};
The .default scope tells Azure AD to include all permissions assigned to the
app.
Securing the API
The API must:
- Extract and validate the access token.
- Authorize based on scopes.
- Authorize based on roles.
Example middleware:
function hasScope(requiredScope: string): RequestHandler {
  return (req: RequestWithAccessToken, res, next) => {
    const scopes = req.auth && req.auth.scp ? req.auth.scp.split(" ") : [];
    if (scopes.includes(requiredScope)) {
      return next();
    }
    return res.status(403).json({
      error: "Scope check failed, client does not have the permission.",
    });
  };
}

function hasRole(requiredRole: string): RequestHandler {
  return (req: RequestWithAccessToken, res, next) => {
    const roles = req.auth.roles || [];
    if (roles.includes(requiredRole)) {
      return next();
    }
    return res.status(403).json({
      error: "Role check failed, user does not have the permission",
    });
  };
}

export function authorize(
  requiredScope: string,
  requiredRole: string
): RequestHandler[] {
  const rtn: RequestHandler[] = [];

  // use CHECK_SCOPE to enable
  if (process.env.CHECK_SCOPE === "true") {
    rtn.push(hasScope(requiredScope));
  }

  // use CHECK_ROLE to enable
  if (process.env.CHECK_ROLE === "true") {
    rtn.push(hasRole(requiredRole));
  }
  return rtn;
}
Endpoints and their requirements:
| Endpoint | Method | Required Scope | Required Role |
|---|---|---|---|
/api/mytoken |
GET | none | none |
/api/todo |
GET | todo.read |
todo.roles.staff |
/api/todo |
POST | todo.create |
todo.roles.staff |
/api/todo/:id |
DELETE | todo.delete |
todo.roles.admin |
Test for all-in-one client
Let’s run the following command in separate terminals:
# backend
CHECK_SCOPE=true CHECK_ROLE=true \
npx dotenv -e apps/backend/all-in-one.env -- nx run backend:serve

# frontend
# change environment.ts's  `useRoleBasedAccessControlOnFrontEnd: false`,
nx run frontend:serve
We can log in with either admin or staff user, and we can check users’ id tokens
and access tokens on the home page. The access token is returned from the
call to endpoint /api/mytoken. Even if we enable both scope check
and role check at the backend, the scope check always succeeds regardless of which user
logs in. This is because the access token’s scp is todo.create todo.delete
todo.read and is assigned to the app, not to the user.
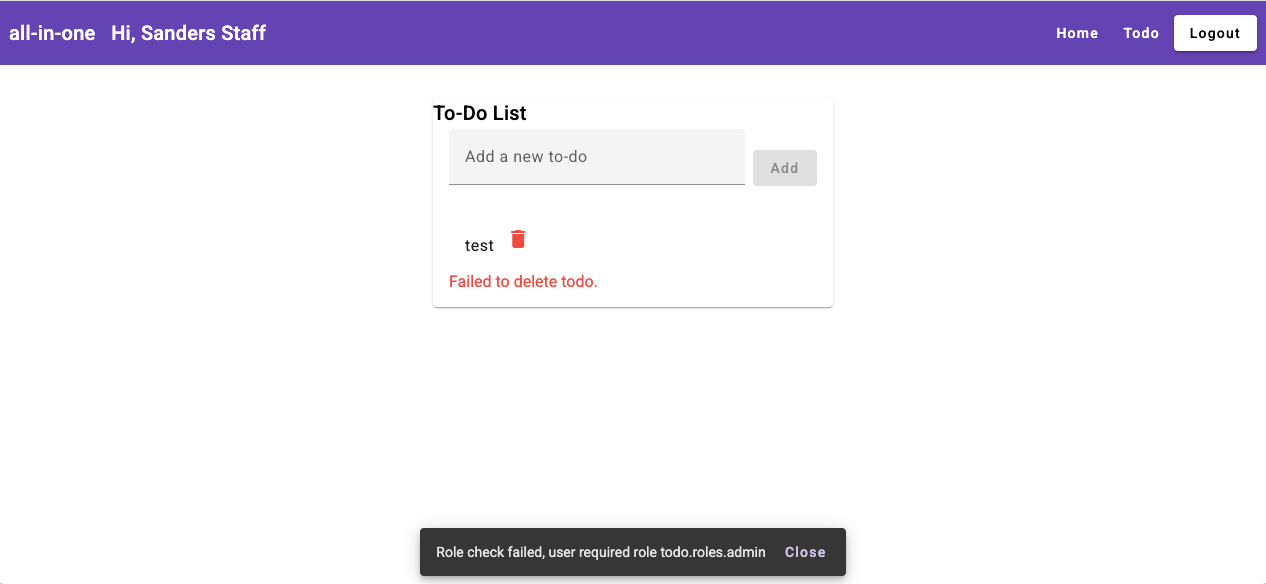
As we started the frontend without role check, the UI looks the same for both staff
user and admin user, but when a staff user tries to delete a todo item, it will
throw a role check error like below.
To prevent this error, we need to enable Role-based Access Control at the
frontend client as well. Because our SPA shared the same client with the API service,
it turns out the Id Tokens also have roles claim. We can use it to show the delete
button only if the user’s role is todo.roles.admin.
 hasRole(role: Role): boolean {
    const account = this.msalService.instance.getActiveAccount();
    if (!account) return false;
    const roles = account.idTokenClaims?.roles as string[] | undefined;
    return roles ? roles.includes(role) : false;
  }

  get isAdmin() {
    return this.hasRole('todo.roles.admin');
  }
<button
  mat-icon-button
  color="warn"
  (click)="deleteTodo(todo.id)"
  *ngIf="isAdmin"
>
  <mat-icon>delete</mat-icon>
</button>
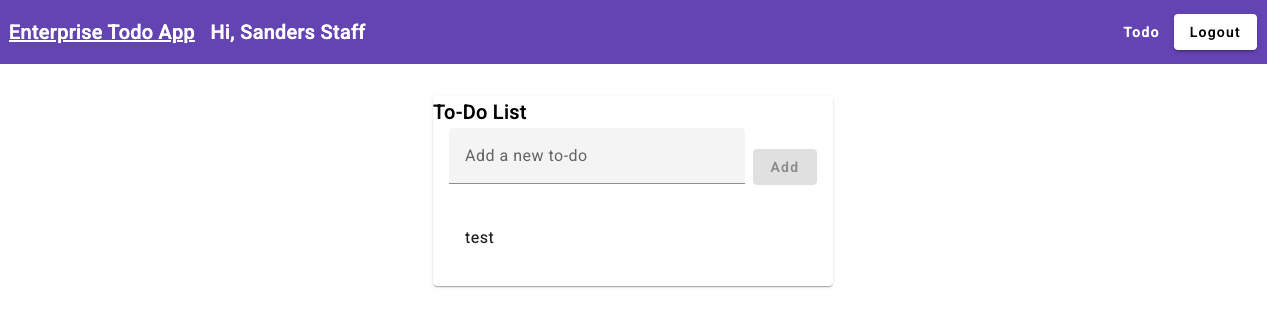
Now change the environment.ts so that useRoleBasedAccessControlOnFrontEnd: true.
The delete button is hidden for the staff user, but it will still be visible
for the admin user.
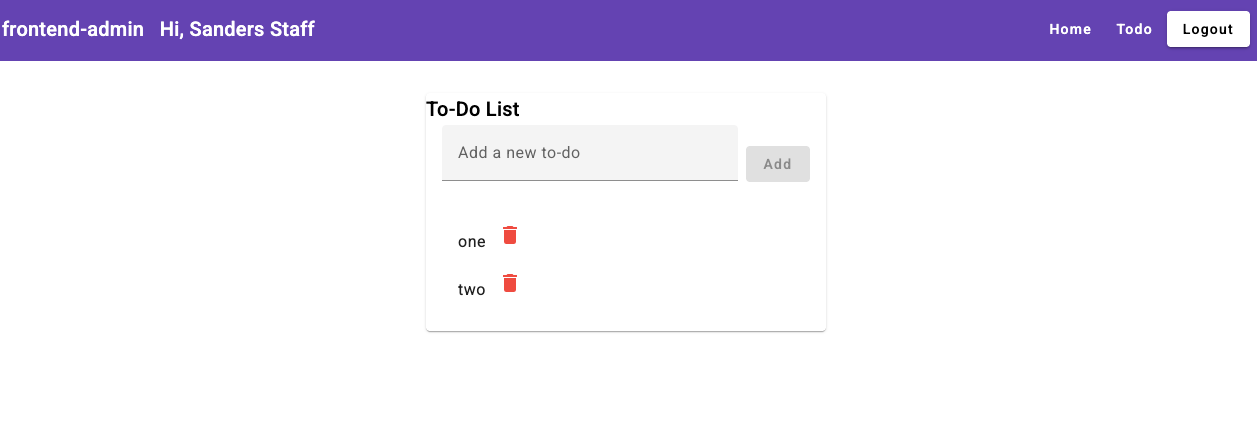
Using 3 Azure AD clients frontend-admin, frontend-staff, backend
When an API is accessed by only one client application, sharing a single Azure AD app registration for both the client and the API can be sufficient. However, in most real-world scenarios, APIs are consumed by multiple client applications, each with different requirements and responsibilities. To ensure that each client app has only the permissions it needs, you should use scopes to control access. Assigning specific scopes to each client app allows you to grant the minimum necessary permissions, following the principle of least privilege.
So now, let’s create two app registrations (frontend-admin, frontend-staff)
and one app registration backend.
Config backend client
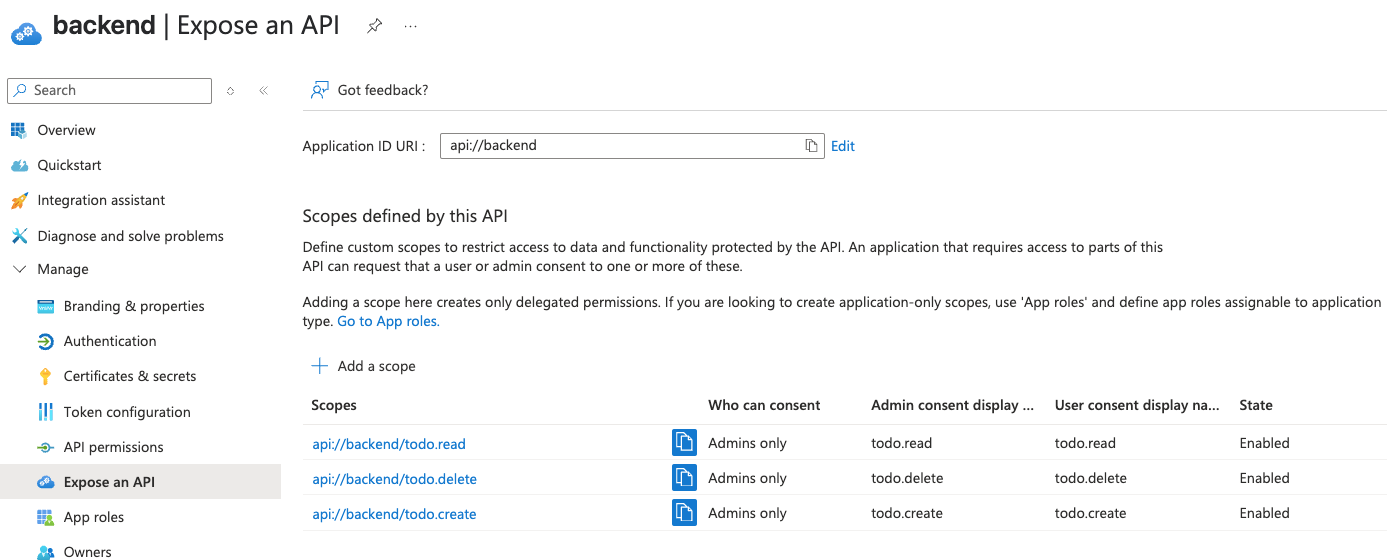
In the backend client, define three “admin only” scopes as before. However, this
time, create the scopes under a new URI: api://backend (instead of the
previous api://all-in-one). For example:
todo.readtodo.createtodo.delete
This ensures the scopes are uniquely associated with the backend API registration.
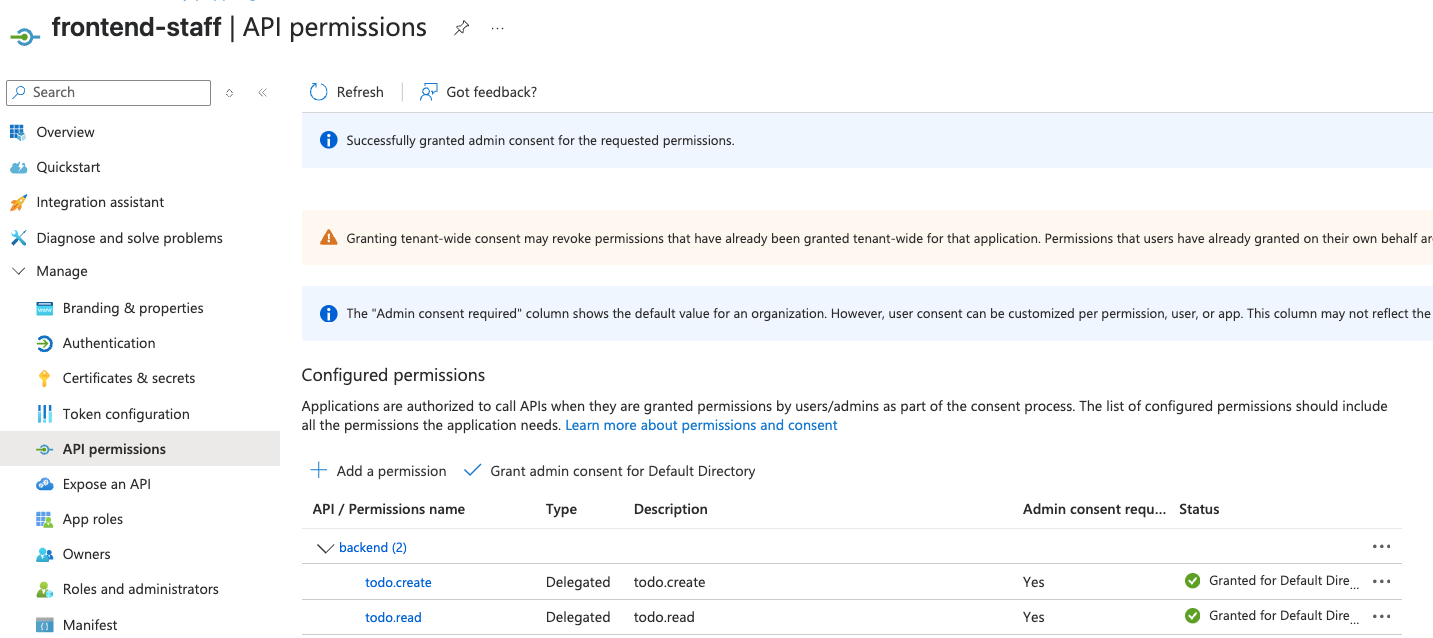
Config frontend-staff
This app is only for staff users, and we can assign todo.read and todo.create
for this app.
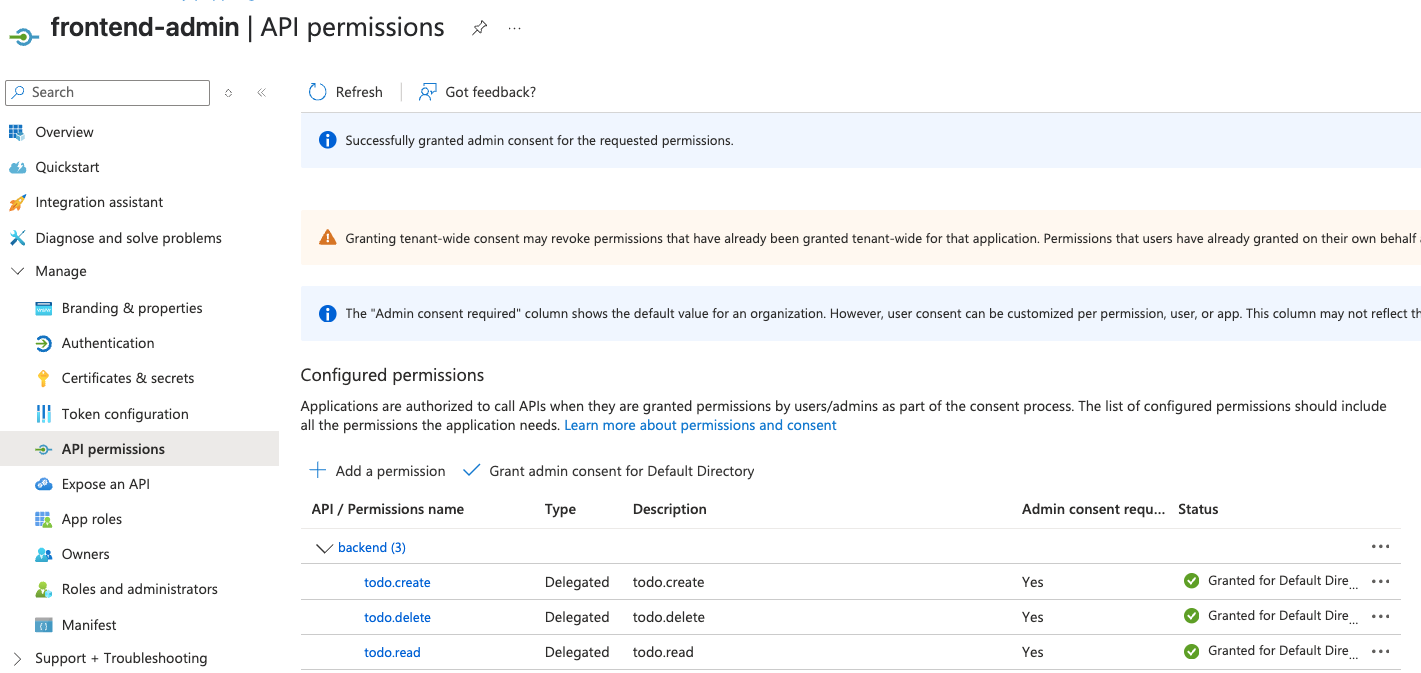
Config frontend-admin
This app is only for admin users. Let’s assign all three scopes to
the frontend-admin client, like the following.
Testing 3 clients mode
In a production environment, it’s best practice to restrict the frontend-staff
client so only users with the staff role can log in, and the frontend-admin
client so only users with the admin role can log in. Each frontend should have
a dedicated UI tailored to its respective user type. However, for testing
purposes, we can allow both clients to be accessed by either user role and use a
shared UI for simplicity.
Let’s run the following code in two terminals:
# backend terminal, disable role checking
CHECK_SCOPE=true CHECK_ROLE=false \
npx dotenv -e apps/backend/backend.env -- nx run backend:serve

# frontend terminal
nx run frontend:serve:frontend-staff
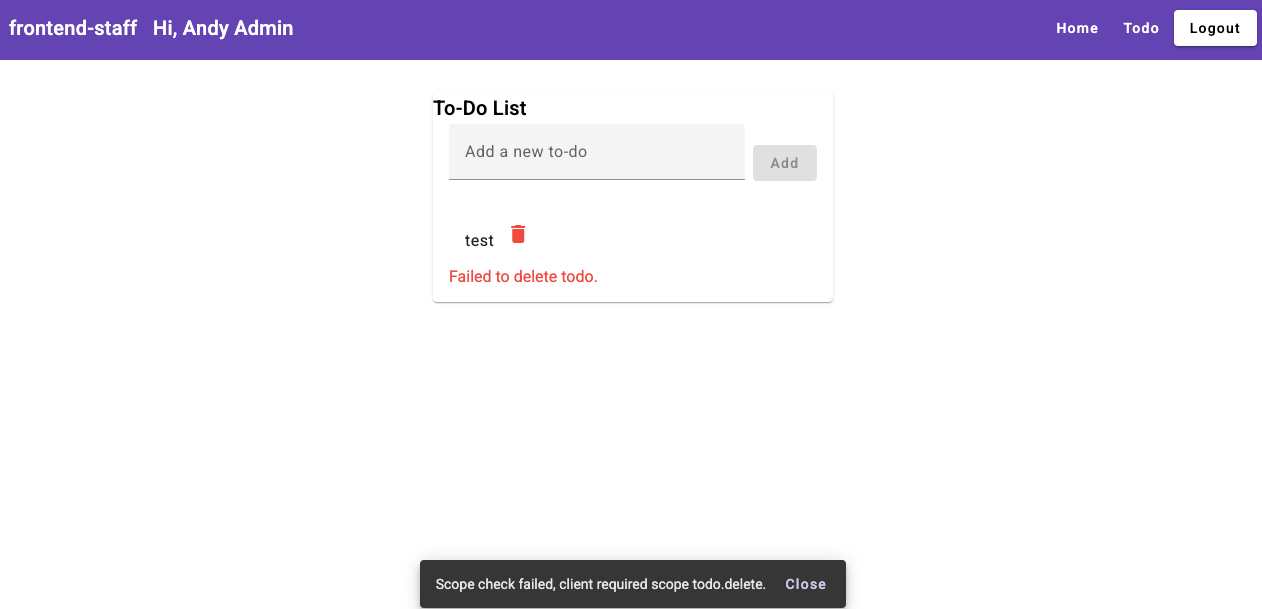
Now, let’s log in as an admin user to the frontend-staff client. The delete
button is still visible—this is expected since role-based checks are disabled in
the UI. However, when attempting to delete a todo item, you’ll encounter an
error: Scope check failed, client required scope todo.delete.
Now, stop the frontend-staff client and start the frontend-admin client. Log
in with a staff user account. Since role checks are disabled on the backend
and the frontend-admin client has the todo.delete scope, the staff user
will be able to delete todo items, even though this action should typically be
restricted to admins.
# frontend terminal
nx run frontend:serve:frontend-admin
The tests above show that Azure AD administrators can assign specific scopes to
each client application, providing coarse-grained permission control. However,
using scopes alone in first-party apps is often not enough—especially when the
UI needs to adapt based on a user’s role. For instance, to hide the delete
button from staff users, the app must know the user’s role. The best practice
for first-party applications is to combine scope-based and role-based
authorization: scopes define what actions an app is allowed to perform, while
roles control what individual users can do within the app. For third-party apps,
scope-based authorization is usually sufficient, since user roles are not
typically exposed or relevant.
Using 2 Azure AD clients frontend and backend
While it’s acceptable to create separate clients for applications with distinct
purposes, splitting highly related frontend apps—like frontend-admin and
frontend-staff—just to enforce only scope-based authorization can introduce
unnecessary complexity in development, deployment, and ongoing management. A
more efficient approach is to use a single frontend client for the app and a
single backend client for the API. By combining scope-based and role-based
access control, you can achieve fine-grained authorization without duplicating
app registrations or increasing operational overhead.
The configuration for this client mirrors that of frontend-admin: it is
assigned all three scopes—todo.read, todo.create, and todo.delete—under
the api://backend URI.
Enabling RBAC in the Frontend When Using Separate Clients
To enable role-based access control (RBAC) in the frontend when using separate
Azure AD clients for the frontend and backend, the frontend app must obtain the
user’s role information. In the all-in-one client setup, role claims are
included in the ID token, so the frontend can access them directly. However,
when the frontend and backend are registered as distinct Azure AD applications,
the frontend’s ID token may not contain the roles defined for the backend API.
While you could duplicate role definitions and assignments in both the frontend
and backend app registrations, this approach adds complexity and can lead to
inconsistencies. A more streamlined solution is to have the frontend request the
access token issued for the backend API, which includes the relevant role
claims. The backend can expose an endpoint (such as /api/mytoken) that returns
the access token or just the user’s roles. The frontend then calls this endpoint
to retrieve the user’s roles and enforce RBAC in the UI accordingly.
Here’s an example of how this can be implemented:
// nodejs backend
app.get("/api/mytoken", (req: RequestWithAccessToken, res) => {
  res.json(req.auth);
});

// angular frontend
this.http.get<AccessToken>("http://localhost:3000/api/mytoken").subscribe({
  next: (data) => {
    this.accessToken = data;
  },
});
Testing 2 clients setup
# backend terminal
CHECK_SCOPE=true CHECK_ROLE=true \
npx dotenv -e apps/backend/backend.env -- nx run backend:serve

# frontend terminal
nx run frontend:serve:frontend
With this configuration, the frontend application can dynamically adjust its
UI based on the user’s roles, while the backend API enforces both scope-based
and role-based authorization. This approach ensures that users only see and can
perform actions permitted by their assigned roles, and that API access is
further restricted by the scopes granted to the client application.
Conclusion
When building first-party apps and APIs with Azure AD:
- Scopes are essential for controlling app-level permissions, especially when multiple client apps exist.
- Roles are crucial for user-level, fine-grained authorization and UI customization.
- For third-party apps, scopes are usually sufficient; for first-party apps, combine scopes and roles for robust security and flexibility.
This approach ensures your internal applications are both secure and user-friendly, leveraging the full power of Azure AD.